Download Agreement, Release, and Acknowledgement of Risk:
You (the person requesting this file download) fully understand mountain climbing ("Activity") involves risks and dangers of serious bodily injury, including permanent disability, paralysis, and death ("Risks") and you fully accept and assume all such risks and all responsibility for losses, costs, and damages you incur as a result of your participation in this Activity.
You acknowledge that information in the file you have chosen to download may not be accurate and may contain errors. You agree to assume all risks when using this information and agree to release and discharge 14ers.com, 14ers Inc. and the author(s) of such information (collectively, the "Released Parties").
You hereby discharge the Released Parties from all damages, actions, claims and liabilities of any nature, specifically including, but not limited to, damages, actions, claims and liabilities arising from or related to the negligence of the Released Parties. You further agree to indemnify, hold harmless and defend 14ers.com, 14ers Inc. and each of the other Released Parties from and against any loss, damage, liability and expense, including costs and attorney fees, incurred by 14ers.com, 14ers Inc. or any of the other Released Parties as a result of you using information provided on the 14ers.com or 14ers Inc. websites.
You have read this agreement, fully understand its terms and intend it to be a complete and unconditional release of all liability to the greatest extent allowed by law and agree that if any portion of this agreement is held to be invalid the balance, notwithstanding, shall continue in full force and effect.
By clicking "OK" you agree to these terms. If you DO NOT agree, click "Cancel"...
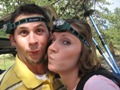
I found Capitol Peak, especially the Knife Edge, to be delightfully fun! Now I should probably qualify that statement by pointing out that I’ve spent my whole summer working up to this, having already hiked 14 other 14ers this summer and having progressed up in difficulty from peaks like San Luis to Wetterhorn to the Crestones and Pyramid Peak. I don’t want my opening statement to entice a beginner to try to tackle this summit since it’s regrettably true that many people have died on this treacherous peak.
However, it you come appropriately prepared (both physically and mentally) and have some experience in more difficult terrain then there’s no reason this can’t be a very enjoyable and even fun experience for you (but see comments below about crowds and falling rocks…). I should add that I’m not really afraid of heights – if you are this peak might be your ultimate nemesis. The exposure, while indeed exaggerated by the many GoPro videos out there, is none the less real and potentially deadly. But, as others have observed, the rock on the Knife Edge is for the most part extremely solid. Plus, unlike the descent off of Pyramid Peak where you’re going DOWN some serious exposure, on the Knife Edge you’re merely walking ACROSS a region with serious exposure on either side. To some that won’t make a difference but for me I was actually a little uneasy in a spot or two coming down off the summit of Pyramid but I was totally at ease and enjoying myself immensely on the Knife Edge - standing upright and walking over much of it.
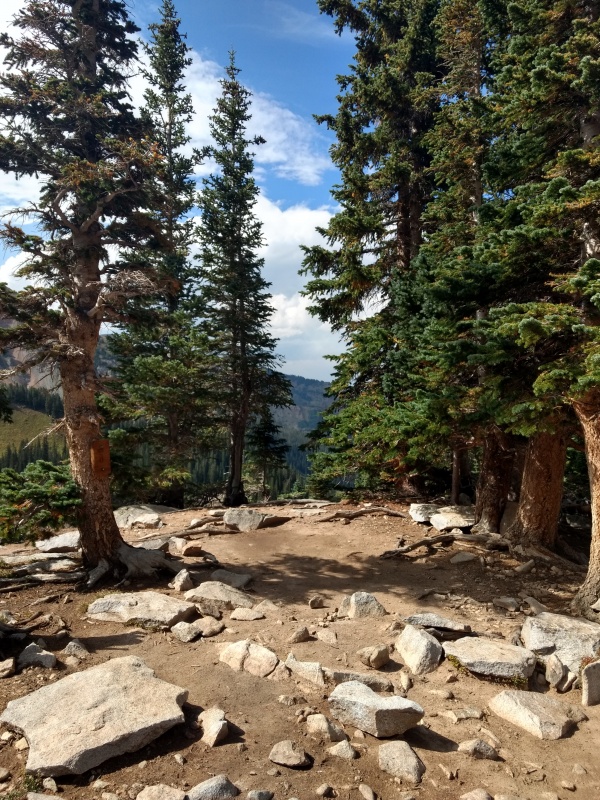
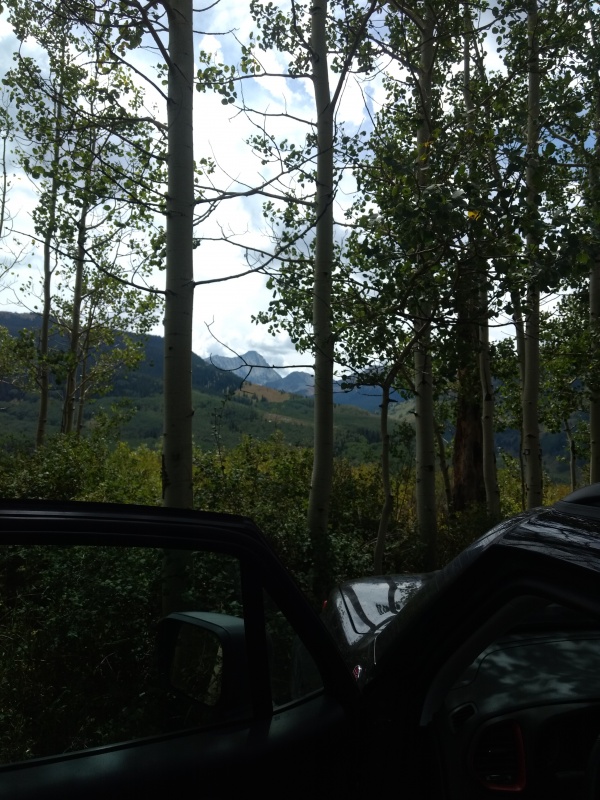
View of Capitol from early on in the hike.
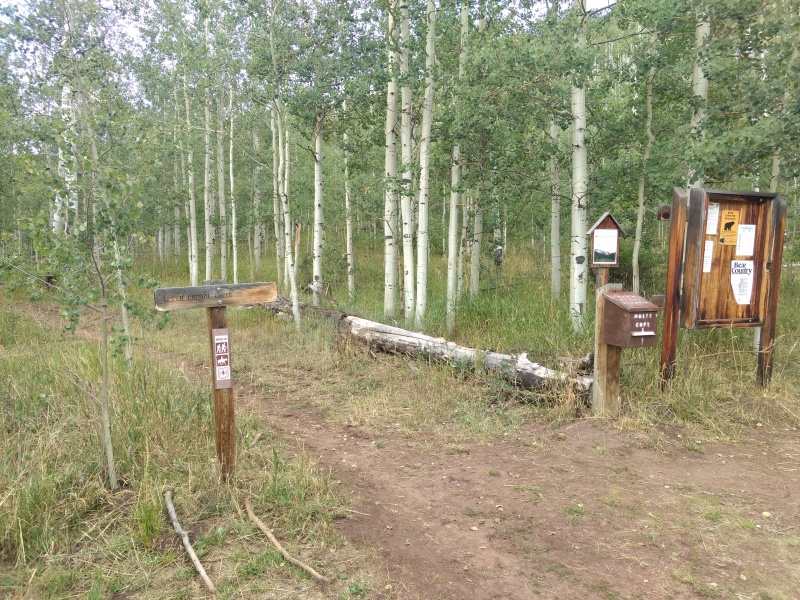
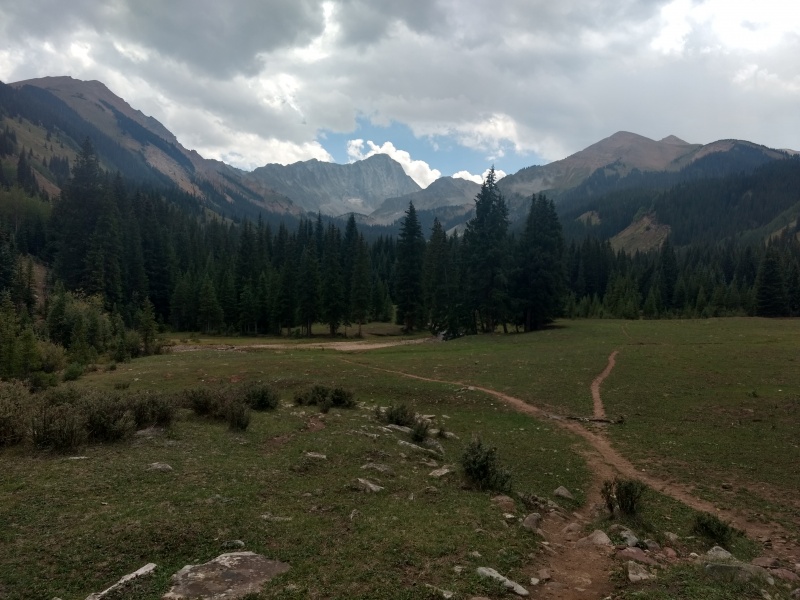
As pointed out in the route description you have excellent views of Capitol Peak right from the trailhead and along a large portion of the hike. But since there are a few spots where the route description leaves out some useful information, especially in regards to the campsites, I’m going to put in a little higher level of detail than I normally do about the trail for this peak.
Be sure not to miss the part about taking the Ditch trail instead of the Creek trail and remember to fill out the overnight permit if you’re camping. The permits are in the box right at the trailhead – they’re totally free and just ask basic info like # in your party, how many nights you’re staying etc. You put the top copy in the slot in the box and the bottom carbon copy you attach to your pack as proof that you registered.
Trailhead for the “Ditch” trail.
Also I would stress, especially if you’re hiking up in the dark to be especially careful not to miss the subtle turnoff at 9,500’ at about 1.2 miles in. There’s only a very tiny sign and a few branches laid out across the trail to direct you down the proper path (I didn’t attempt to follow the other one so I’m not sure how far off that will take you).
Subtle turnoff at ~1.2 miles in. Be careful not to miss it if you’re hiking after dark. The trail is up to the right.
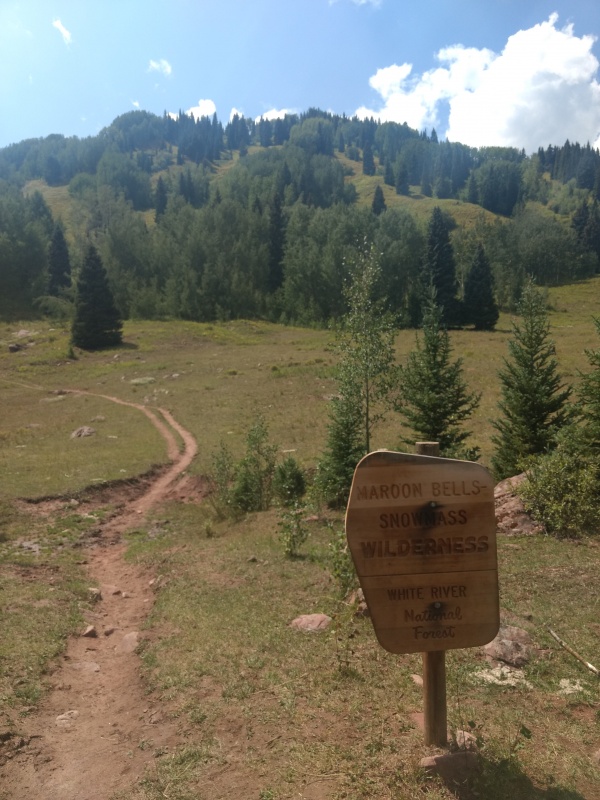
One indication that you made the right turn will be that you’ll see the Maroon Bells – Snowmass Wilderness sign a little ways afterwards.
Maroon Bells – Snowmass Wilderness.
If you’re hiking in daylight there’s a fun little optical illusion that might baffle your brain for a second if you look up at just the right moment under the right lighting. There’s a grassy hill that at one point lines up perfectly with Capitol Peak making it look like the peak has a green hillside going up it. That really messed with my head for a second until my brain could process what I was looking at.
Bizarre optical illusion where Capitol Peak puts on a grassy cloak for a little while.
The “grassy cloak” is then donned by Mt. Daly for a bit.
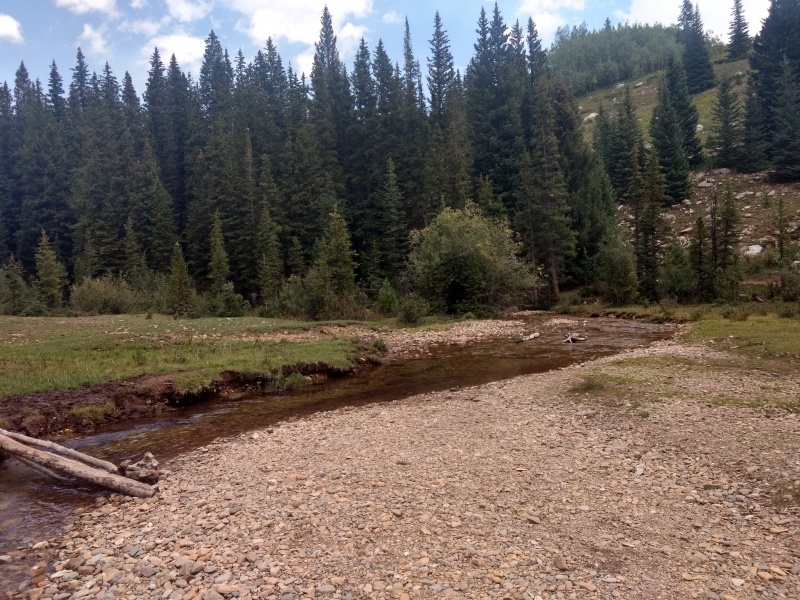
When descending into the meadow you’ll reach another spot that would be easy to get lost in if you hiked it in the dark. As the route description states, take the fork to the left. As of when I hiked there (Aug 2018) there were a couple small logs placed over the skinniest part of the stream just to the right of the main trail.
The meadow where you want to take the left fork. Just off to the right side of the left fork were a few small logs allowing me to walk across the skinniest part of the stream.
Looking back across Capitol Creek from the other side. The trail is just in front of the trees but the little log “bridge” is at the left edge of the photo (off to the right of the trail as you’re coming from the trailhead).
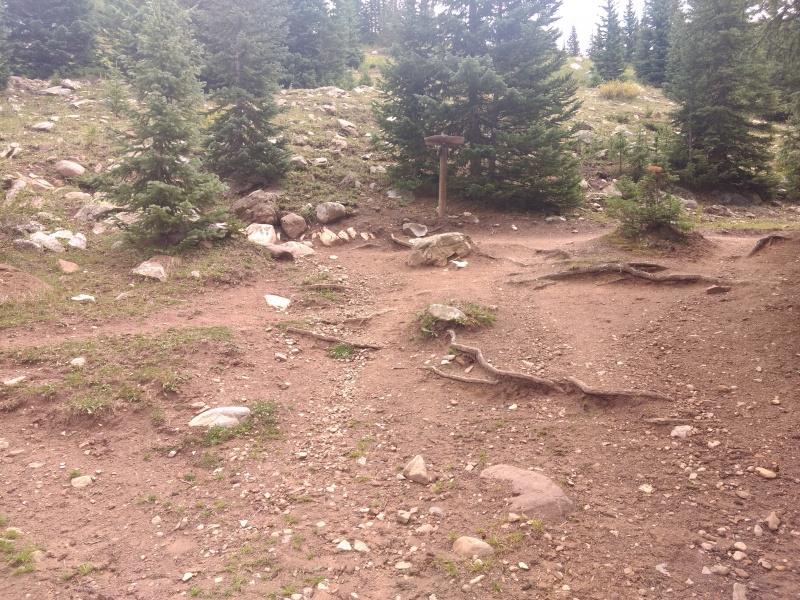
Also important to note, especially for anyone hiking in the dark, is that just past this stream crossing is a junction where the signage is very clear but set back far enough off the trail that you might possibly miss it in the dark.
This sign clearly shows that the trail to Capitol Lake is to the right but it’s set so far back that you might have trouble spotting it in the dark.
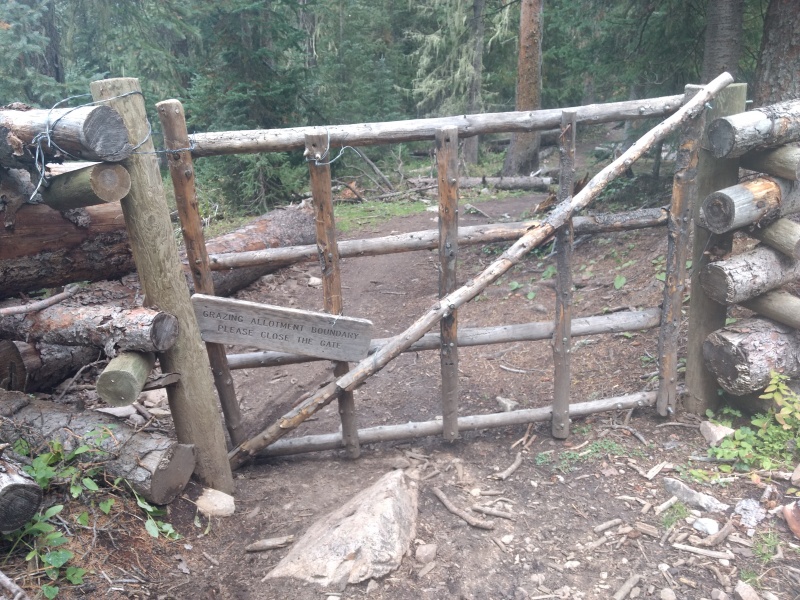
A handy thing to be aware of that was not mentioned in the route description (as of when I wrote this trip report) is that there is a cattle gate at around 10,300.’ It has a simple wire loop latch to hold it shut. Be sure to close this behind you when you pass so the cows don’t get through.
Cattle gate near 10,300’
Opposite side of the cattle gate.
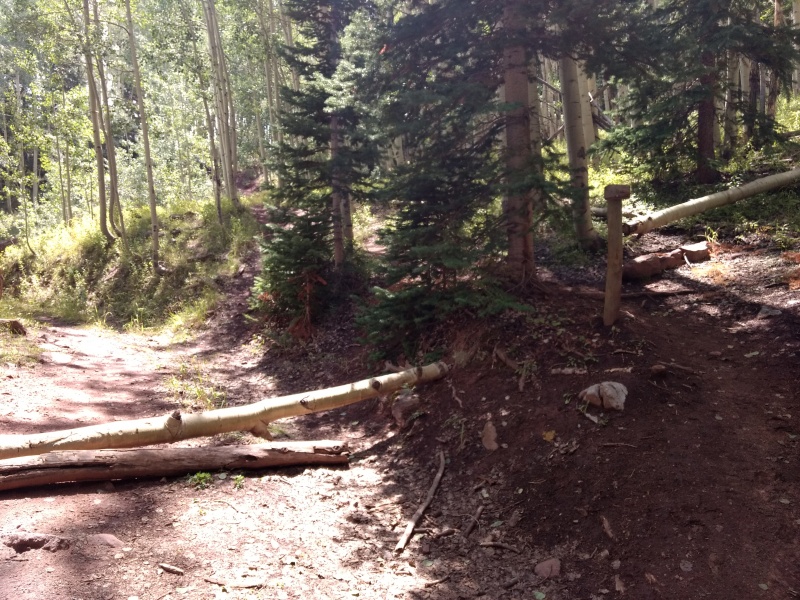
As of the time of this writing there were a couple spots along the trail with some rather large downed trees blocking the trail. No doubt these will eventually be cut away but always keep in mind that at any time on any trail there’s always a potential for trees to drop over the trail and make you practice some gymnastics to get over them.
Tree creating an obstacle on the trail – hopefully this will soon be chopped apart by whoever does that sort of thing…
The stream crossing up past the cattle gate is another area that’s easy in the daylight but might possibly throw you off for a moment in the dark. Just look for the log “bridges” with worn spots on the other side.
One of a couple of natural log bridges you’ll cross.
As you get close to the campsites there’s a hillside with a slightly confusing assortment of dirt paths. Just stick to the trail most traveled as you make your way up to the right.
Hillside a little below the campsites.
The signs for the turnoffs to the campsites aren’t all that large so keep your eyes open if you’re coming up in the dark.
Sign for the turnoff for campsites 1-4.
Path leading off to campsites 1-4.
I didn’t check out campsites 1-4 but I did examine sites 5-8 in detail and since it seems to be hard to find much data on them anywhere I thought it might be useful to have a little more detailed description of what’s available and how it’s laid out.
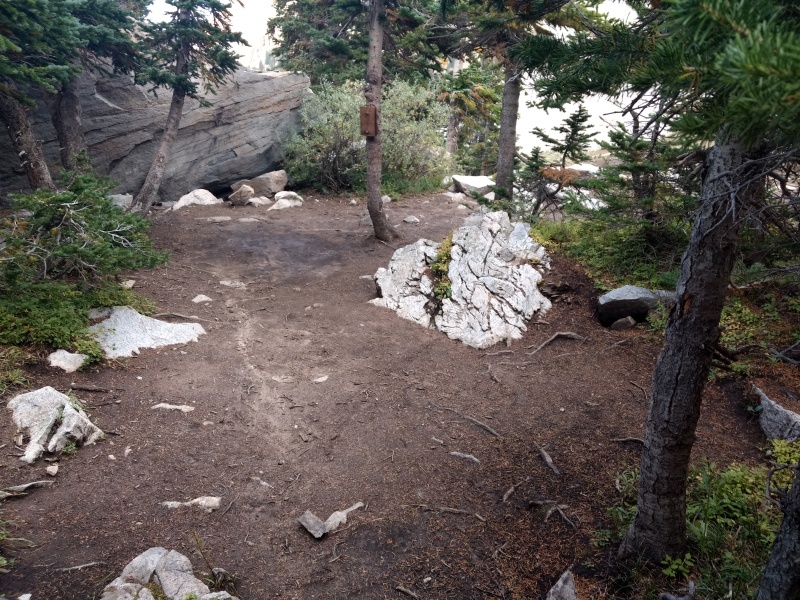
Sign for campsites 5-8 (to the right). To the left is the summit trail and forward is the trail to the lake.
Site 5 is the site closest to the lake and the summit trail and also at the bottom of the little hill that sites 6-8 are on. But it is almost right on the trail and pretty visible to all who pass by to the other sites thus it was not my pick for best site (and was already claimed when I arrived at around 3:30pm by two guys I would later team up with ).
A few folks have claimed that site 6 has the best view. While it does have a decent view of the lake it suffers from being the highest up the hill and by far the most exposed with only a few small pine trees nearby. I don’t think I would feel very comfortable at that campsite in a thunderstorm. Plus it’s a pain to walk up to if you’re already tired.
View of lake from campsite 6
View of campsite 6. It is small, exposed and the highest up the hill.
Small open spot next to site 6 where another tent could be setup. It is even more exposed than the spot next to it.
One confusing thing is that after you pass campsite 5 you’ll come across campsites 7 and 8 before you reach campsite 6, although you’ll see a sign pointing that site 6 is ahead. There are signs for sites 7 and 8 but they’re very small and you have to go off the trail next to the sign pointing that site 6 is ahead in order to see them.
Small sign with #6 and an arrow pointing out that site 6 is ahead. The path to the right leads to sites 7 and 8 which, oddly, are closer and lower down the hill than site 6.
Signs for sites 7 and 8 which you’ll see after going to the right in the photo above.
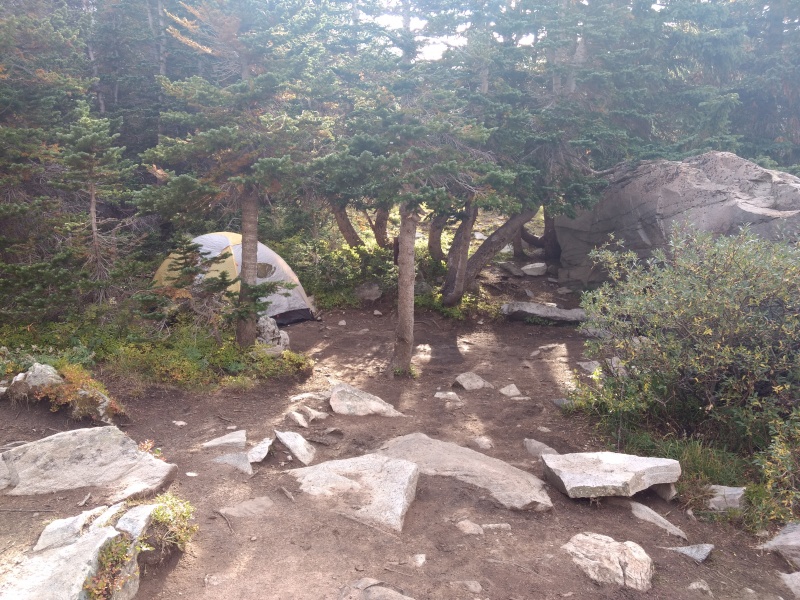
I felt that site 7 was by far the best site. It is the most secluded/private of the sites, has a bunch of trees to provide shade/shelter, has a huge boulder next to it which can provide some shelter and has great views of the valley below and from the top of the boulder you can also see the summit. But like all of these sites it’s pretty small and while you could probably put a couple tents in the flat spots, the flat spot nearest the boulder was a bit of a mud puddle so I took the dry spot closer to the entrance.
Campsite 7 with lots of trees and a large boulder sheltering it plus great views of the valley from the back right of the site.
View of the valley from the back right of campsite 7. You can see the trail you come up on.
Backside of the boulder at campsite 7. Someone had previously built a fire here. Not sure if that’s legal especially under the fire conditions we’ve had this summer but this boulder does slope out just enough to give at least a little shelter in the event of a storm. This is where I stashed my bear canister and ate breakfast.
Campsite 7 after I put my tent up. Between the tent and the boulder is a low spot that was a bit muddy.
Panoramic view from on top of the boulder at site 7. The path up to the saddle is in the middle and the summit to the far right.
Campsite 8 is one that is pretty much visible from campsite 6 and a little too open for my preferences but does at least have some taller trees near it than site 6 so I would take it over site 6 if there were storms coming and I had the option.
Campsite 8. Not the best of privacy but does has some tall trees near it.
Close up of opening for campsite 8. Not all that large and looks like part of it is prone to hold water.
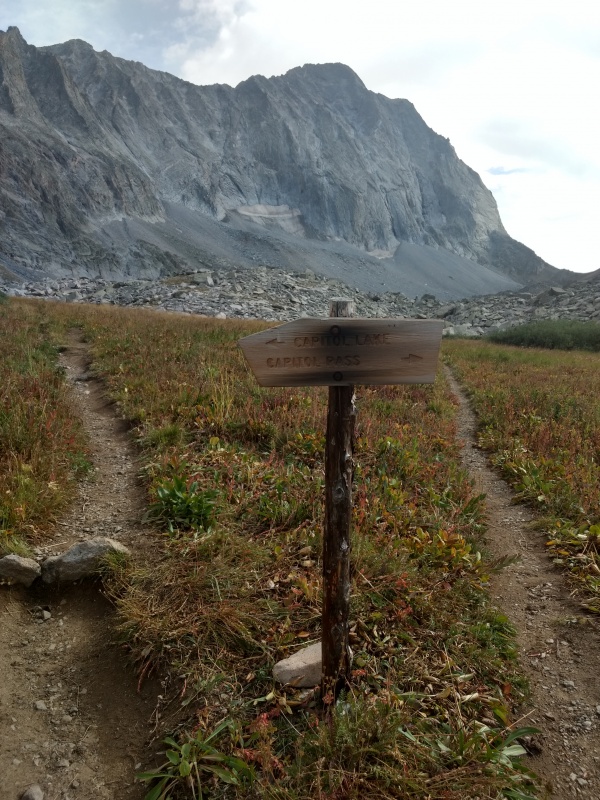
There is a stream of sorts running right by the trail junction between sites 5-8 and the summit and lake trails. While some people were managing to filter water from it I found (in late August at least) that it was preferable to go up to the lake to get water. There’s a clear sign helping direct you to the lake.
Sign pointing out paths to the lake and to Capitol Pass.
Path heading out up to the saddle from the campsite/lake junction.
View of the 4 way junction from partway up the hill to sites 5-8. The lake is off to the right and the trail to the saddle is straight ahead.
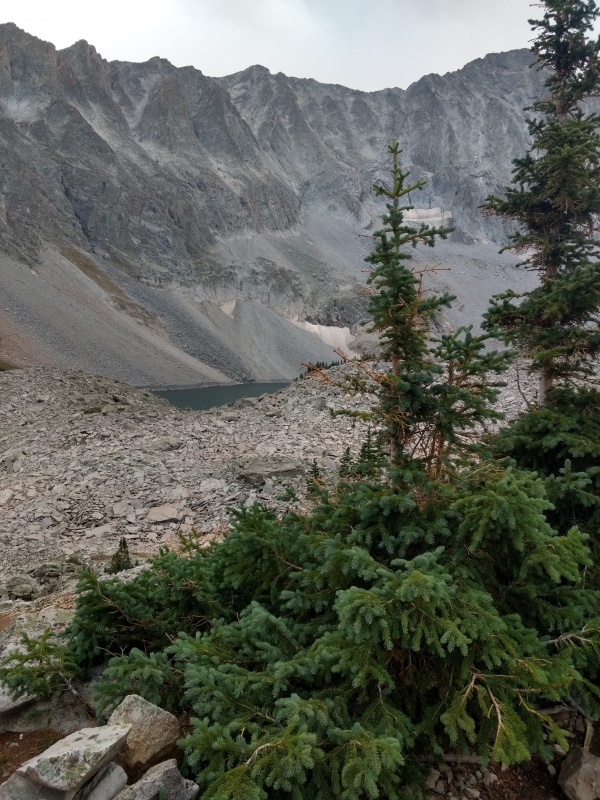
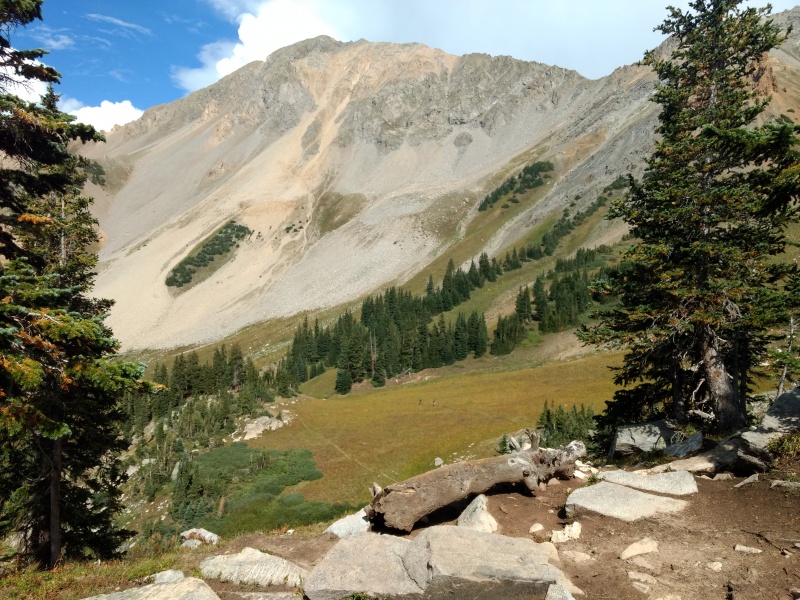
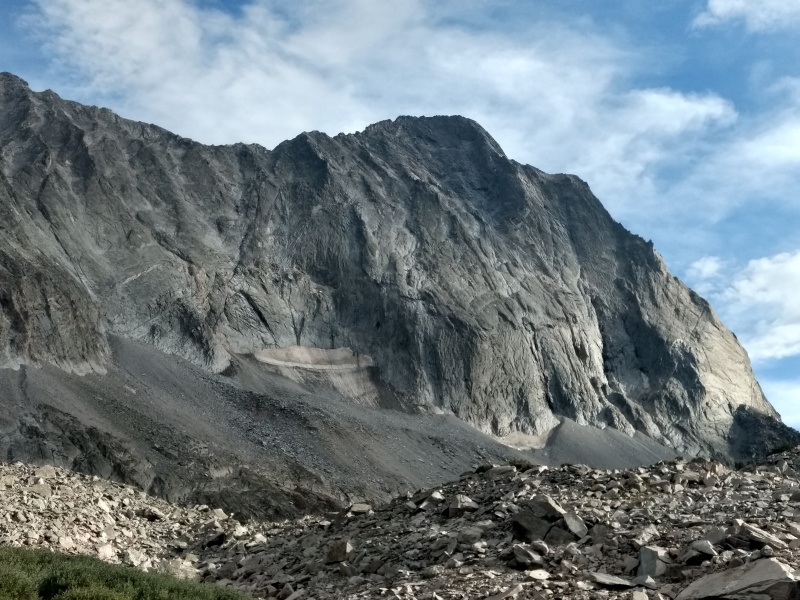
From Capitol Lake you have some excellent views of the summit and if you look closely can spot the sharpest point of the Knife Edge which shows up as a very flat stretch with an almost U shaped chunk of rocks which look gauged out of the mountain just beneath it.
View of Capital Peak from the Lake. K2 is on the left and if you look close you can see about a quarter of the way from the left side is a very flat spot with a U shaped indention under it. The is the sharpest spot of the infamous Knife Edge.
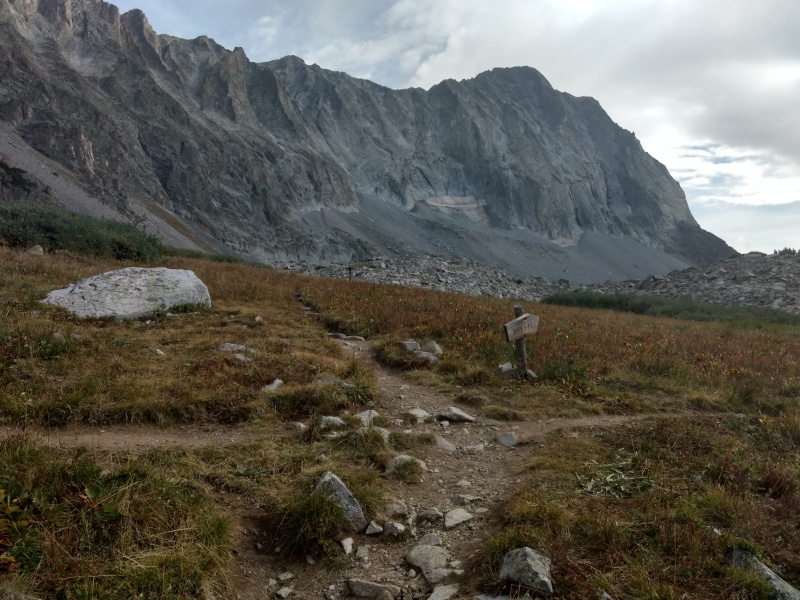
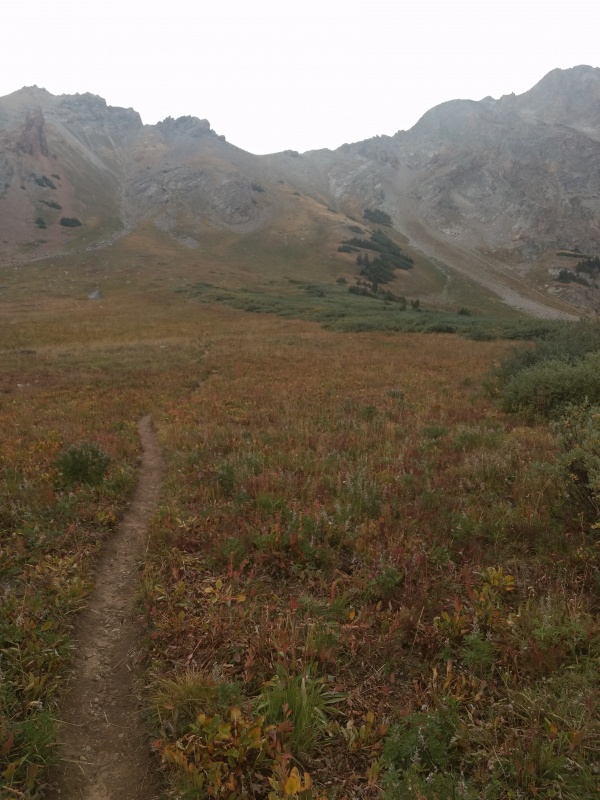
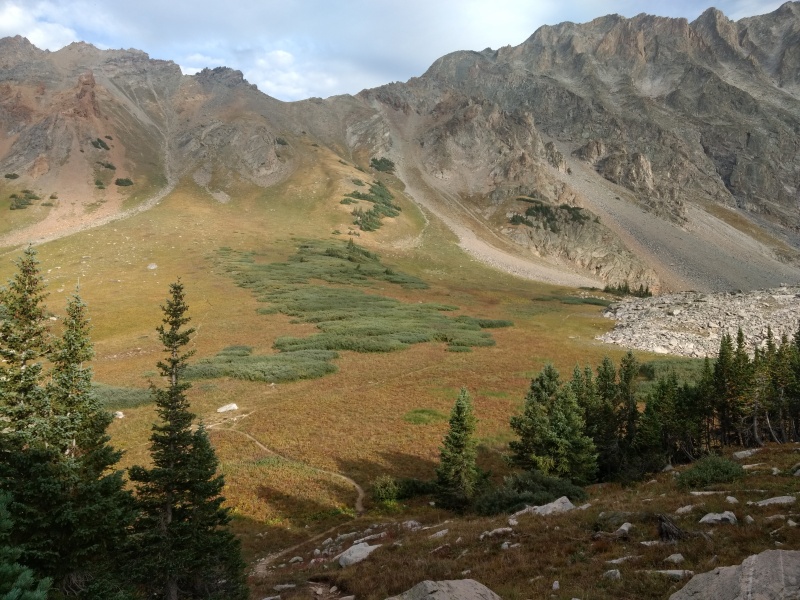
The trail up to the saddle was so trivial to follow that when I started up at 3:46am I left my headlamp off most of the way up and walked up by moonlight (but there was a long line of headlamps not far behind me). NOTE: be sure to start this trail early if you’re hiking on a weekend – even leaving at 3:46am Saturday morning I was barely ahead of the main pack at the start of the day. Made good enough time to stay ahead of most of them but there was plenty of rockfall up past the Knife Edge later that day as the crowds moved in. There are many spots past the Knife Edge where the falling rocks could be deadly so be VERY, VERY careful in this section and try to beat the crowds there if possible so as to lower the danger.
As for the navigation from the saddle to K2 – it’s very easy to flounder around in the dark and especially to have trouble figuring out when to take the hard right up to K2. A very good idea is to login into the 14ers.com website and download the gpx file to show the entire trail. I previously used two different apps to help me on the trail – a generic Android app called GPX Viewer to open the gpx file from the website which and also show my current position in relation to the trail and then a separate app, MapMyHike, to keep track of all my stats and record a trail showing where I had hiked.
But on this trip I tried out a different app, GAIA GPS, which took the place of both of these. It can open the .gpx file from the 14ers.com website so I can see where I am in relation to the trail and it also creates a track showing me where I’ve been so I can backtrack if needed. It also has the ability to zoom in and out to a much greater degree than other apps without ever losing the topo lines (like some apps annoyingly do). I highly recommend this app as a companion for your hikes and a great way to get back on route if you start to lose your way. There are also rock cairns here and there but some of these may mislead you so I would use those together with the GPS and a general idea of where you need to go from studying photos before you go.
Getting up onto K2 wasn’t bad at all – we basically just did a frontal assault, slightly to the right (but all had prior experience on class 3/4 terrain).
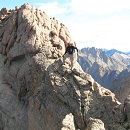
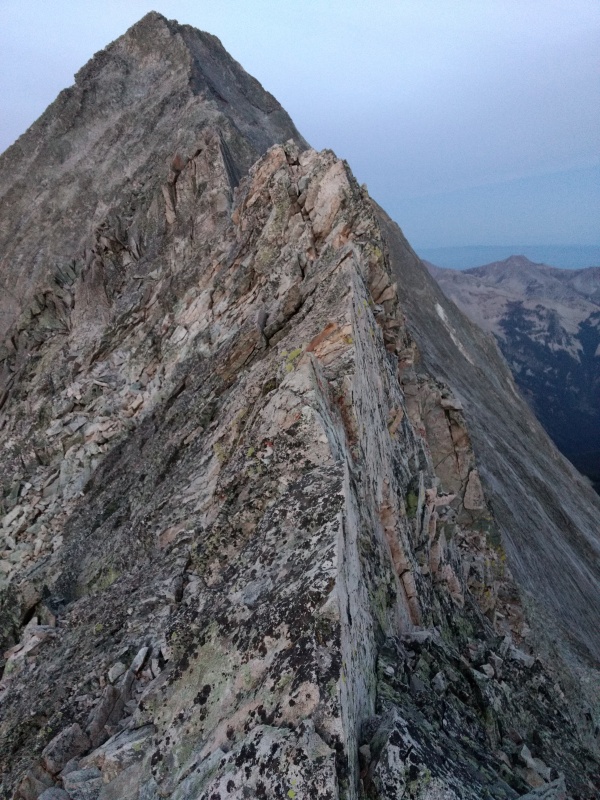
As for the Knife Edge itself, some of the ridgeline is actually fairly wide and tame but there is a spot on either side of the sharpest section of the Knife Edge (before and after) which we initially mistook for the real Knife Edge (I believe the entire ridge is named the Knife Edge but the guys I teamed up with from the saddle on deemed the sharpest spot the real Knife Edge and the one before and after it the “butter knifes.”
View of the “Butter Knife” that you find a short ways onto the Knife Edge ridgeline. We thought at first that this was the main knife and were kind of disappointed. But the real knife is a little further along the ridge.
This is the real Knife Edge which was more satisfying than the “Butter Knife” which preceded it (or the other small one after it).
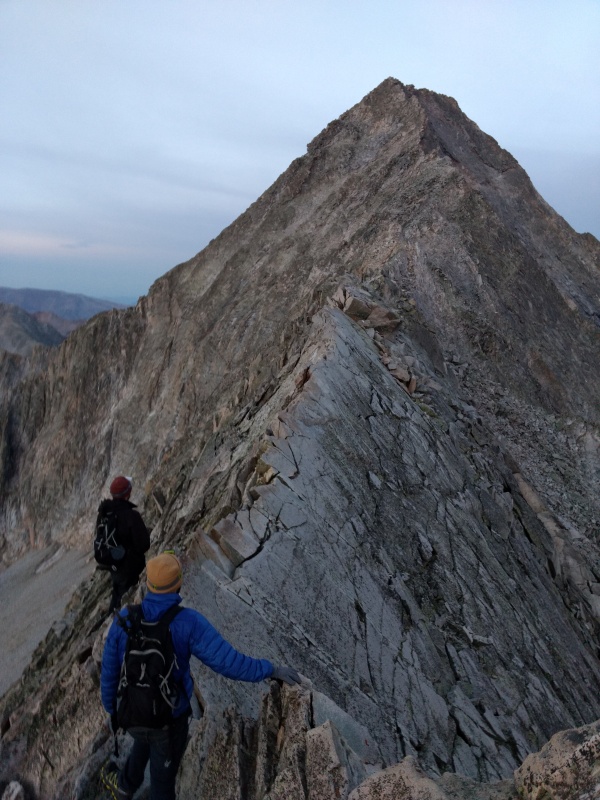
My impromptu hiking buddies weren’t quite up for walking the Knife Edge on the way there.
While it’s well known the GoPro’s exaggerate the angle of the Knife Edge, and even normal cameras can make it look more daunting than it really is, it’s definitely no joke and a fall here could easily be your last. But the rock along this section is the most solid I’ve ever encountered and with careful foot placement you can walk at least partway across this, depending on your comfort/balance/etc. The photos tend to make it look more dramatic than real life but if you’re afraid of heights you might crawl across this section weeping, if you dare go past it at all.
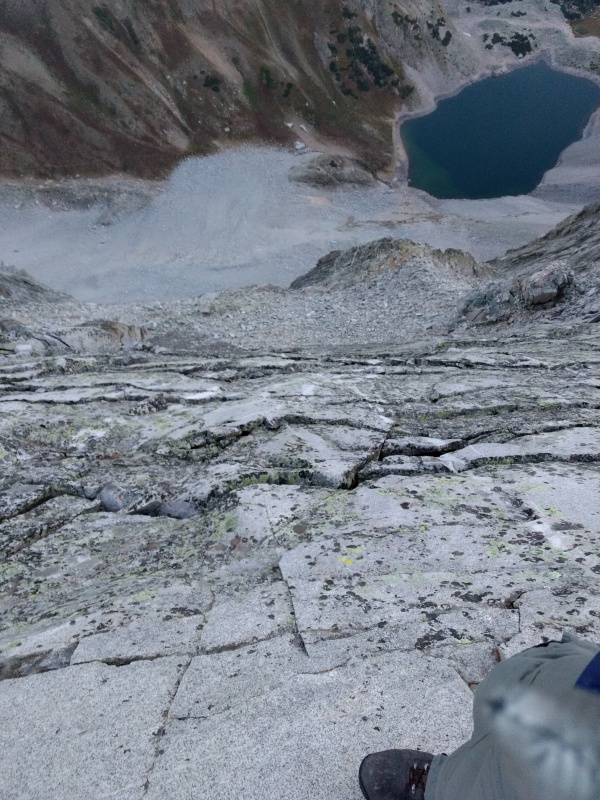
View next to my left foot while standing on the Knife Edge. The camera exaggerates this but it is still a pretty good drop off. I found this section to be really fun.
View next to my right foot while standing on the Knife Edge.
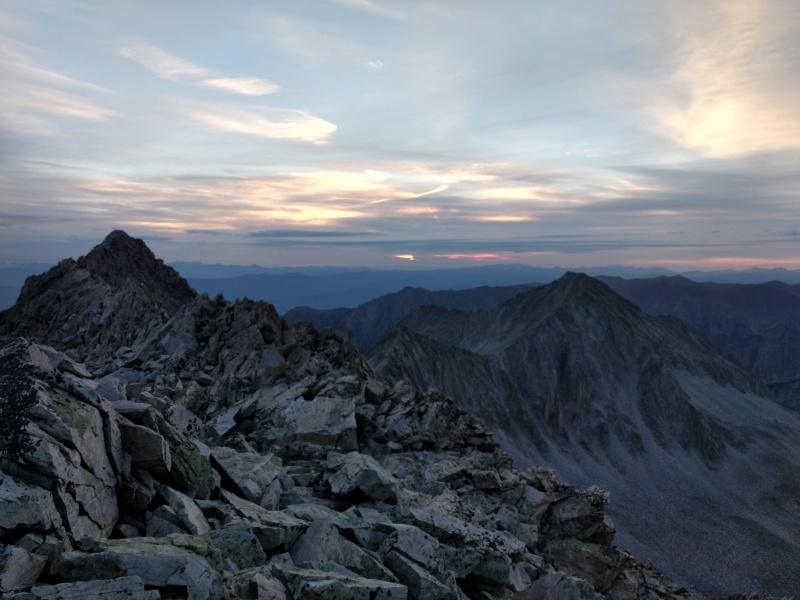
Looking back across part of the Knife Edge towards K2 as the last colors of the sunrise were visible.
As stated before, the section past the Knife Edge is where the rock fall danger is greatest. If you stay on the section where most people have walked you’ll find most of the loose stuff has already been knocked off (when thousands of people take the some trail every year that tends to be the case on any peak). But since it’s not always clear where that trail is and it’s easy to stray a bit you’ll find plenty of sections that still have loose rock. If you’re knocking a bunch of stuff down you’re probably not on the main trail (and also not being careful enough).
Again I stress that it’s advantageous to try to reach this sections before the crowds so as to minimize the danger of having rocks knocked down on you (or of knocking rocks down on others). Please be aware of and considerate of others and consider pausing where you are if you spot people hiking directly below you. It’s a good idea to call out to folks to make them aware if you’re just above/below them so people know to be a little extra mindful. There are again rock cairns across this area which might help you or mislead you so study your route before you go and use the GAIA GPS app to help if you get too lost.
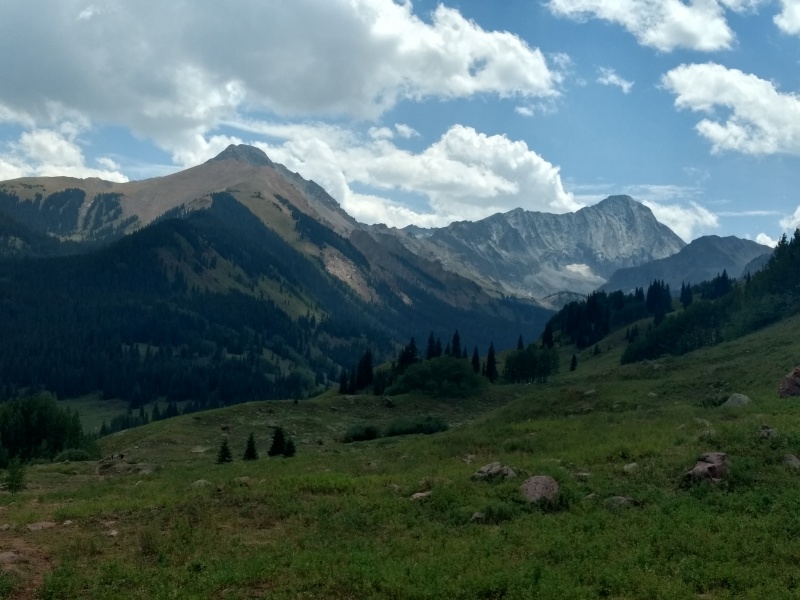
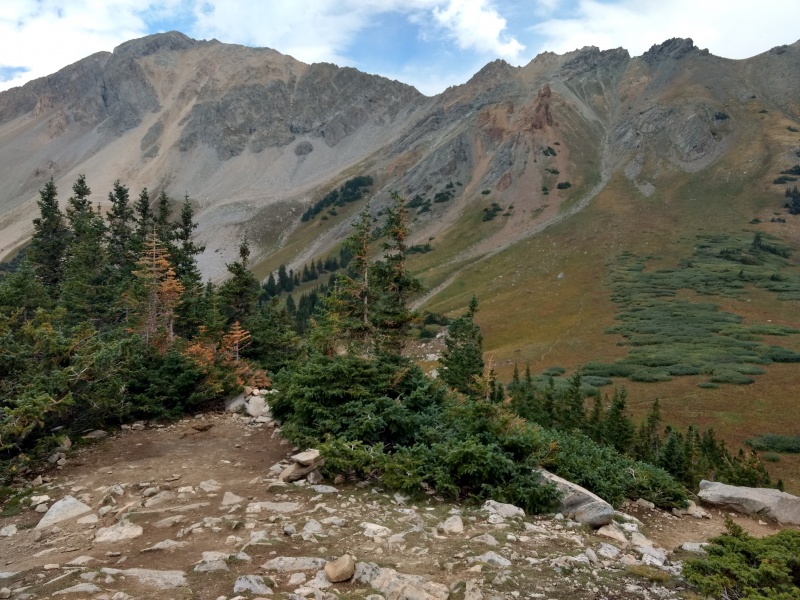
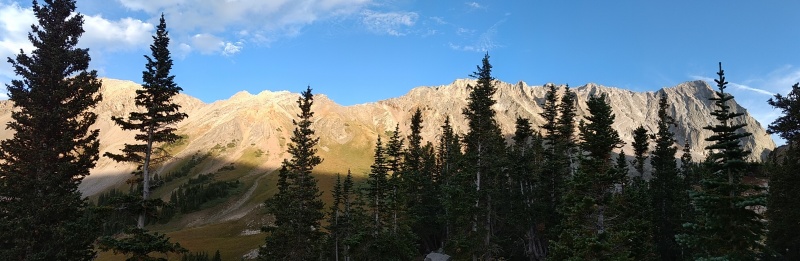
There are some really great views in this area and up on the peak.
Nearby ridge that looks way more wicked than the Knife Edge.
View from the summit
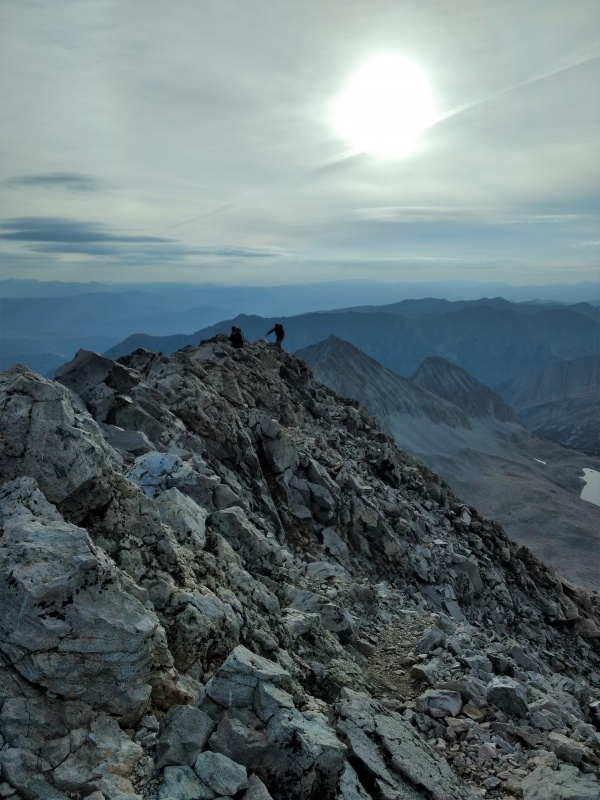
One thing that the route description didn’t make clear was how long the summit ridge is. The pictures made it look like it’s a very small summit that you pop up onto but in reality you come up onto a somewhat long ridgeline that you have to walk along (with some descent exposure) until you get over to the summit.
View looking out over part of the summit ridge that you have to hike along. You can see a couple climbers coming up.
We were the first to the summit that day, arriving at 7:18am. A couple more folks came up just as we were leaving at about 7:45am but we soon starting meeting more and more people coming down from the summit and as we went back across the Knife Edge. Sometimes the rock fall could be heard like thunder and it would take a minute or two before the rocks finished crashing all the way down to the valley below. Please practice walking over loose terrain on a less dangerous peak before you attempt to climb this summit! Many of these rocks are especially sharp which only adds to the potential deadliness!
Going back over the Knife Edge we had some minor traffic jams passing people coming up but nothing too bad. On the way back my climbing partners got their courage up enough to more thoroughly enjoy the fun offered by the Knife Edge. Just make sure you’ve proven your balance on safer spots before you try this since, at the risk of overdoing the warnings, you can easily die here if you’re careless. It’s actually pretty safe if you’re sure footed and I wasn’t really uncomfortable at all but some people are totally freaked out by this kind of exposure and we met some folks who outright refused to go over it and waited for their climbing partners to summit and return. It’s a beautiful place to sit and wait for folks if you’re not up to going across.
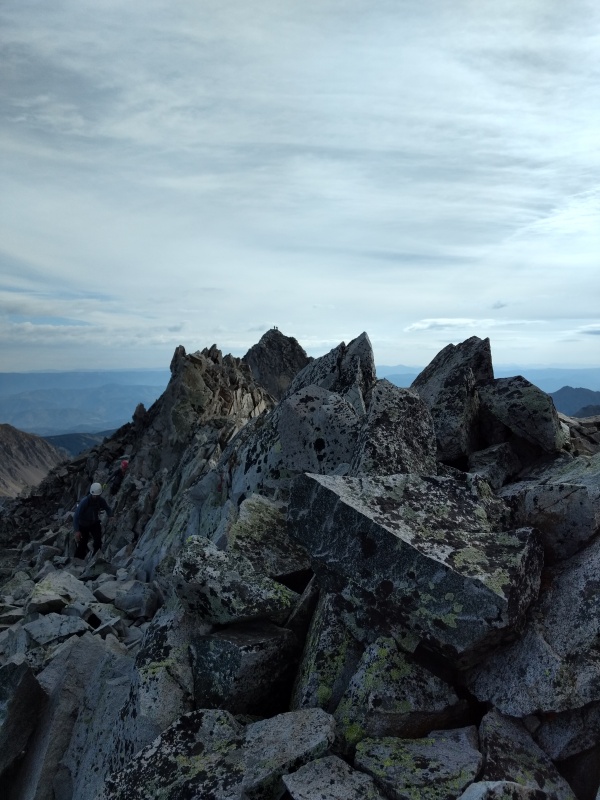
View coming back across part of the Knife Edge. In the extreme distance in the center of the photo you can make out 2 climbers on the top of K2, as well as 2 others just coming off the end of the Knife Edge at the left edge of the photo.
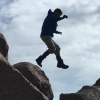
Climbing companions taking a bolder approach on the way back across the Knife Edge.
The hike back from the lake to the trailhead is long though I managed to trim it down from 3 hours coming in to 2 hours going out – but I was really booking it on the way back. Others have said it took as long to hike out as to hike in and I believe that would have been the case if I wasn’t pushing hard. Oh, and of course you can’t write about Capitol Peak without pointing out that this might just be the first time in your life that you end up taking a picture of a cow!
Classic cow on the trail photo. This was the only one I encountered actually on the trail itself but I saw a number of them and smelt more of them as well as stepped over signs of their passing…
One key thing to note for those wanting to camp at Capitol Lake: I arrived at the lake at ~3:30pm on a Friday to find sites 6-8 open but by dinner time everything was packed. Hiking out on Saturday I passed more than 8 groups going up with camping packs on even though I was back at the trailhead by 1:13pm. If you wait until after lunch on a weekend to hike to the lake you will very likely find all the spots full! On Friday night I heard people wondering around in the dark saying “well maybe we might be able to squeeze our tent in this little spot…” I recommend heading up in the morning and plan on just hanging out. Honestly, for me, after hiking in 6 miles with a full pack, setting up the tent, filtering water from the lake, chatting with some others, taking some photos, etc I was pretty beat and ready to sleep so there wasn’t all that much time to kill.
View of the trailhead when I got back at 1:13pm and Saturday. I had passed more people on the way up to the lake than there were designated spots for. Plan on leaving no later than noon if you want to have a chance to actually choose a campsite rather than squeezing in whatever tiny spot you can find.
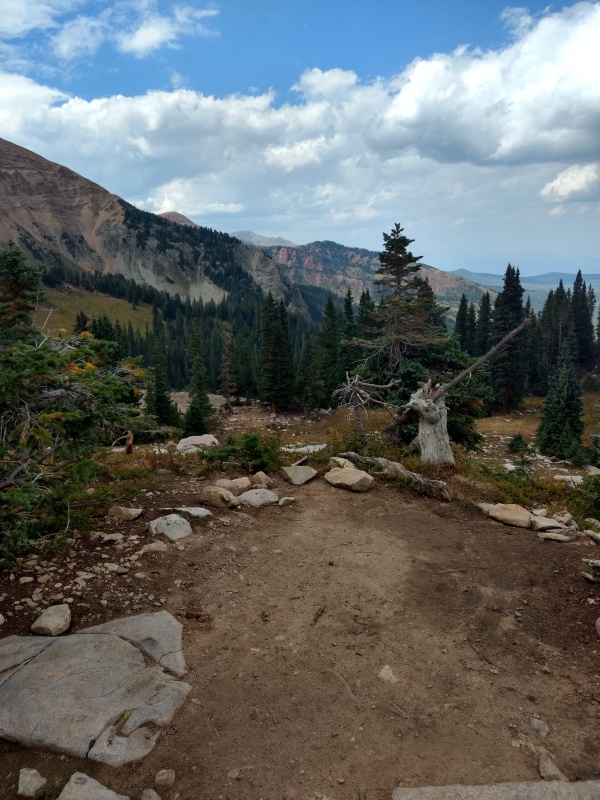
Last parting photo of the summit as seen from the trailhead.
I put in my gpx file of the hike to the lake with some waypoints for the campsites (you’ll note my random wandering past site 6 when I was trying to find sites 7 and 8 which I initially overlooked). The track to the summit you can get from 14ers.com
Stats: 17mi RT (~6 miles to the campsites). 5,300’ gain (about 2k to the lake)
~3 hours from trailhead to campsites
~4 hours from lake to summit
~3 hours summit to lake (moving fast, including jogging down from the saddle)
~2 hours lake to trailhead (totally booking it so I could go enjoy the Glenwood Springs hot springs)
Friday:
12:10pm started from the trailhead after having lunch on the drive in.
2:03pm made it to the cattle agte at ~10,300’
3:15pm made it to the turnoffs for the campsites
Saturday:
3:46am start up
4:28am top of saddle
6:02am K2 summit
6:38am far side of Knife Edge
7:18am Capitol summit
~7:45am start descent
9:00am back at K2 (went around this time)
10:16am top of saddle
10:33am back at campsite 7
11:17am finished packing up tent and headed for trailhead
11:53am at cattle gate
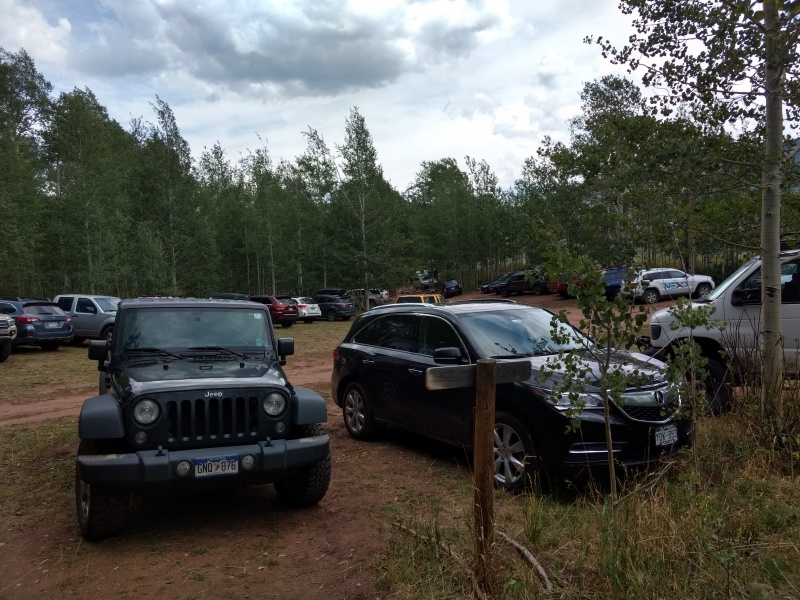
1:13pm searching for my Jeep amongst the enormous mass of vehicles at the trailhead.
My GPS Tracks on Google Maps (made from a .GPX file upload):
I thoroughly enjoyed reading about your trip! Congrats!! And a big thank you to do much detail. All the advice you have was perfect and really helps understand what to expect and prepare for. I always love to know timeframes of hikes broken up as you did. Nice to have something to gauge time. Beautiful job!!
Great day on a challenging peak! 8/27/2018 11:51am
I'm pretty sure I passed you and your partners coming down off the summit. Were you guys kind of stuck for a short time on a ridge trying to descend to the main route about 500ft from the summit? If so, we were below you pointing out the safe line. Funny enough (but not at the time) we ended up getting stuck on the same ridge when we were coming down and had to wait out those below to avoid rock fall on them. Fantastic trip report! And I wish someone wrote it before I climbed that peak.
When I was up there in 2011 there were no logs across the stream and water was high, so used flip-flops to cross. Wondered whether I would need them for a climb next month. Looks like logs provide a nice crossing, so can leave flip-flops in the SUV.
Yes, I think that was us - I had spotted the line to take but my partners were reluctant to take it with you guys below, which was a good call since I think I did knock a decent sized rock loose getting over to that spot. It's very easy to pick a poor route in that section but fortunately not too hard to get yourself unstuck, except when you have to wait out the traffic jams...
I climbed Capitol 2 or 3 days after you and felt the following:
1. The boulder basin was longer and more tedious than I had ever dreaded it would be. Next time I will hang a hard right from the Daly Saddle and run the ridge all the way to K2 and skip that nasty punishment down below.
2. I felt the downclimb off of K2 was the most technical climbing of the day. It was the steepest sustained pitch I did with more vague holds than the rest of the climb.
3. The Knife Edge gets so much publicity that the rest of the route is often forgotten and little reported. My climbing partner and I made the same mistake and felt like we missed a big opportunity to show a lot of other exposed terrain and challenging route finding. I routinely looked down and saw the same drop as when I was on the Knife. Parties were taking a dozen different routes toward the summit. Two parties of three climbers each were even roped together. I wasn't expecting the variety of route choices. Few followed Middleton's suggestions especially close to the summit, which I personally found to be the crux, at least in route finding if not in difficulty.
As for your item 1. I don't recommend that - there were some folks who did just that the day I went up. We saw them heading up that direction with a pretty good lead on us but we totally smoked them getting to the top and they appeared somewhat frazzled and worn when they finally made it to the summit. The basin is tedious but there is a route through it that's more worn and easier to travel, if you can find it. However that ridgeline is far worse punishment than anything you'll encounter in the basin, at least based on the descriptions I was given. I understand it to be at least as challenging, and probably more so, than the downclimb off of K2 you describe. So pick your poison carefully...
Caution: The information contained in this report may not be accurate and should not be the only resource used in preparation for your climb. Failure to have the necessary experience, physical conditioning, supplies or equipment can result in injury or death. 14ers.com and the author(s) of this report provide no warranties, either express or implied, that the information provided is accurate or reliable. By using the information provided, you agree to indemnify and hold harmless 14ers.com and the report author(s) with respect to any claims and demands against them, including any attorney fees and expenses. Please read the 14ers.com Safety and Disclaimer pages for more information.
Please respect private property: 14ers.com supports the rights of private landowners to determine how and by whom their land will be used. In Colorado, it is your responsibility to determine if land is private and to obtain the appropriate permission before entering the property.


")
")
")
")
")
")
")
")
")
")
")
")
")
")
")
")
")
")
")
")
")
")
")
")
")
")
")
")
")
")
")
")
")
")
")
")
")
")
")
")
")
")
")
")
")
")
")