| Report Type | Full |
| Peak(s) |
Der Zerkle - 6755 |
| Date Posted | 02/04/2021 |
| Modified | 05/23/2021 |
| Date Climbed | 02/02/2021 |
| Author | daway8 |
| Der Zerkle: Southern Squeeze & Sunnyside Two |
|---|
|
Writing this report to highlight an interesting way to get to the top of Der Zerkle that I haven’t seen described in any of the Flatirons resources I’ve come across (I've for the moment dubbed it the Southern Squeeze). This is also somewhat of a sequel to my previous Flatirons report: Flatirons Intro UPDATED I've also now updated this report to include a brief description and some photos of Sunnyside Two - an easy class 4 route on Der Zerkle that takes you to the base of the chimney described below. If you’re new to the Flatirons and not already an experienced climber I’d recommend checking out some of the "easy" class 4 routes in that report first. I'm honestly not sure exactly what rating to give this route (someone more experienced can chime in) but it felt like a notable step up from the class 4 routes in the last report so I'm guessing low 5th class. When open (bat closures April 1 - Sept 1, for much of Der Zerkle but Sunnyside 2 stays open, as of this posting) this route offers:
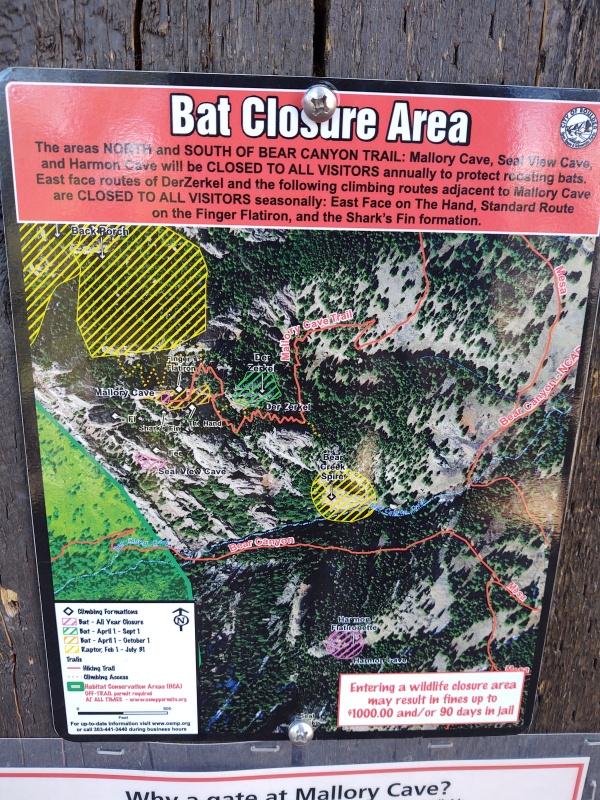
Please don't try this as your first rock scramble ever - it is possible to fall to your death here. I've done the Royal Arch, Freeway, Buckets, etc plus plenty of visits to the local climbing gym over the last year or two and still got nervous enough the first time up this that I had to pause a couple times and take some deep breaths before continuing on. If you're not used to this kind of climb it has the potential to really pysch you out (though climbing guru's will probably only see it as a mild warm-up). This can be a really fun route to level up your experience on but just be careful. Update for closure info: since originally writing this report I've found a far superior resource for zeroing in on exactly what is and isn't closed - the website linked here and shown below has fantastic aerial images if you turn on the 2018 Imagery basemap and it clearly shows what is closed at the current time. Initially this only displayed properly on mobile but now it seems to work with this link on my pc as well: https://maps.bouldercolorado.gov/wildlife-closures 

Maps/Orientation The first map below I added to the updated version of my earlier report and include here again since most resources don't seem to give this kind of overview. I'm also including a trails/contours version for additional information. 

Finally a zoomed in view showing the trails from NCAR to Der Zerkle - just a few junctions to take note of. 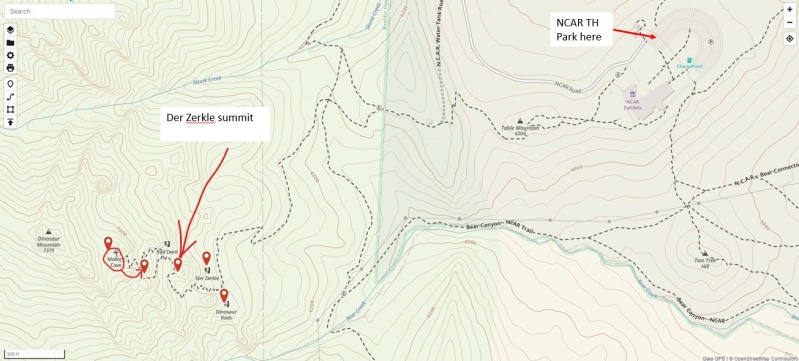
The Approach From the NCAR trailhead (you can literally type "NCAR Trail Head" into Google Maps and get there) just follow the NCAR Trail to the Mallory Cave Trail, connecting the dots as in the map above. If you're going for Sunnyside Two that'll be along the south side of Der Zerkle and also with lead you right to the base of this route - more on that towards the end of the report... 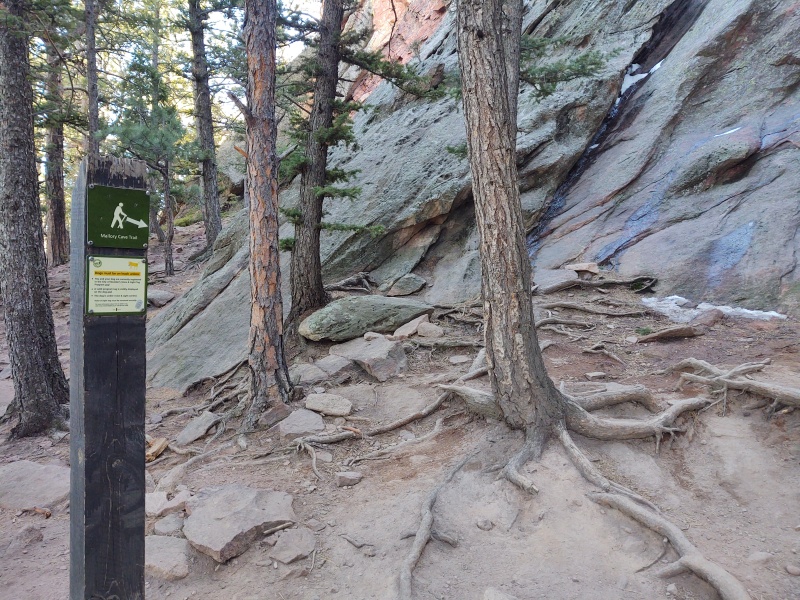
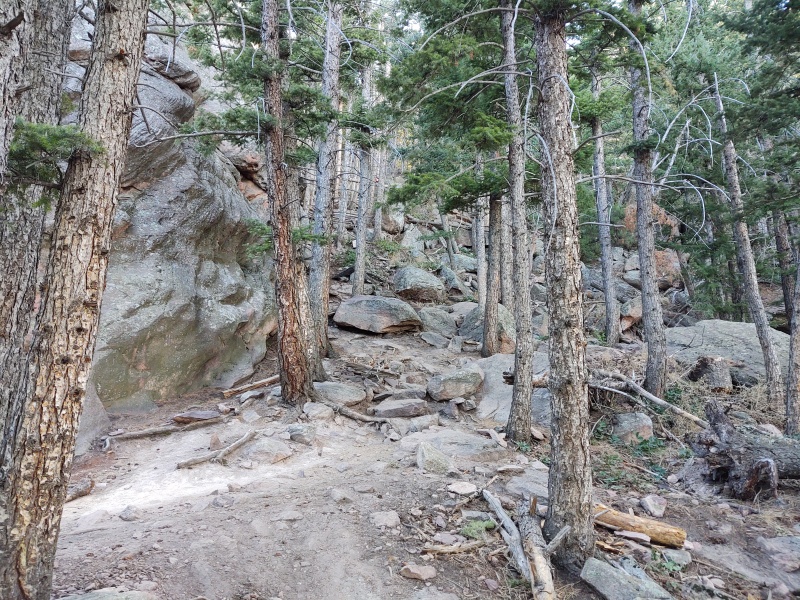
If you go up Sunnyside Two to get to the Southern Squeeze then you can reverse the directions below as an alternate way down. After that go until the Mallory Cave Trail curves around behind Der Zerkle but before it curves off again in the other direction, just as you're passing through a couple large rocks, go forward towards Der Zerkle, swinging around slightly to the left as the Mallory Cave trail cuts hard left. As of this writing there are a few logs laying over some rocks pointing the way. If those go away just look for the next rock gap shown. Pardon the cheesy phone annotations - maybe someday I'll clean those up to look better (no, probably not actually...). 

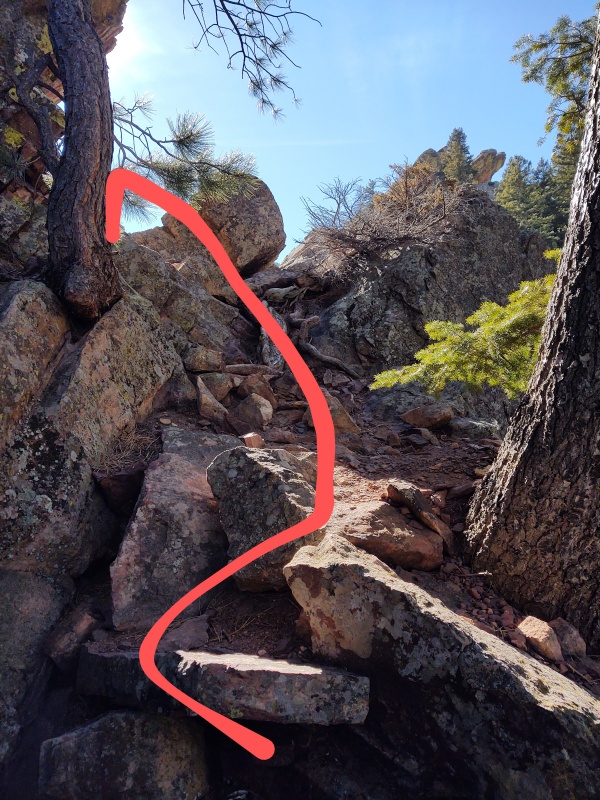
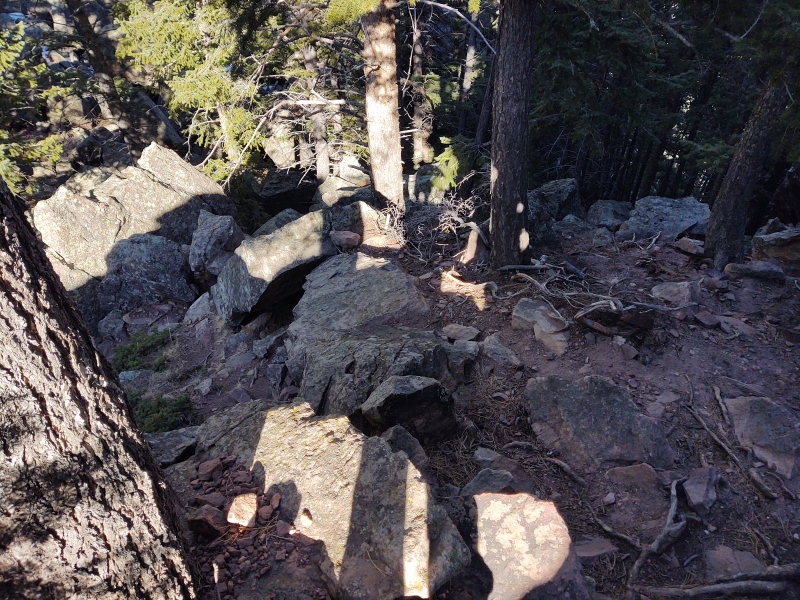
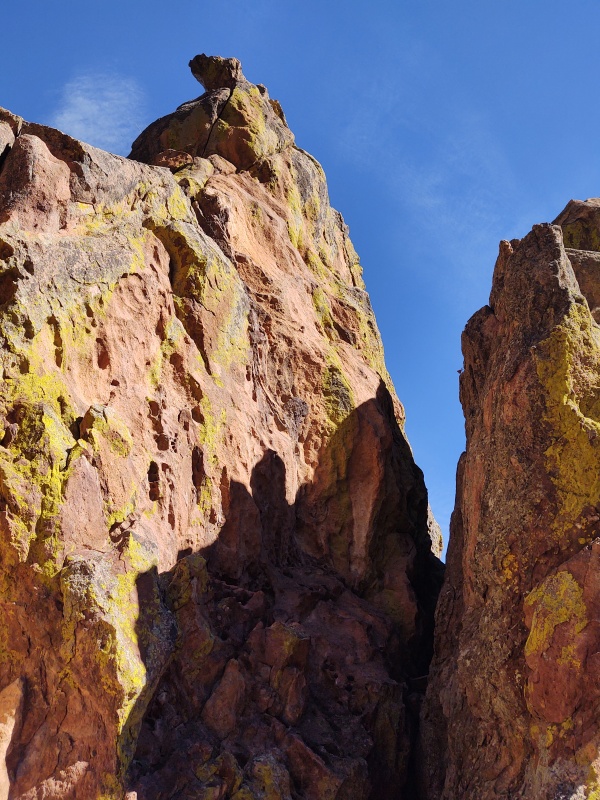
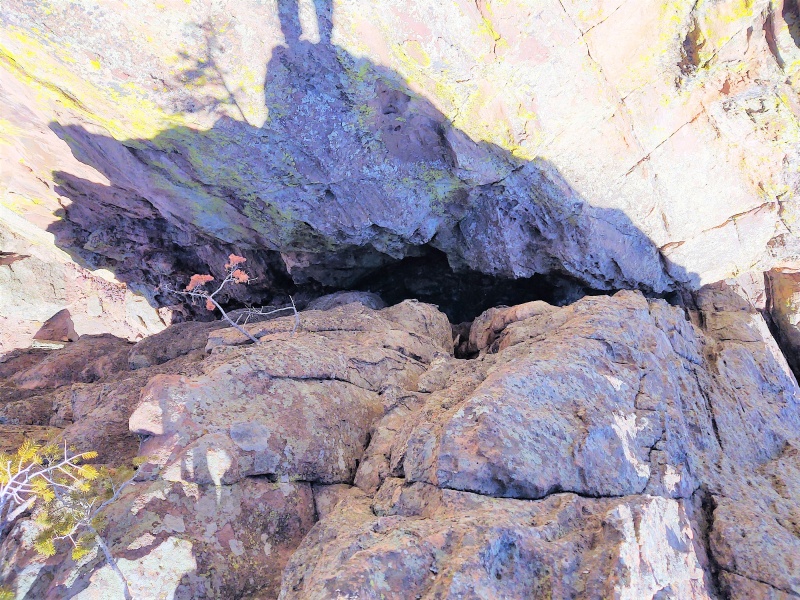
After you start to get close to the rock formation then swing right up over some small boulders into a small clearing in front of the chimney-like gap between the Der Zerkle summit and Overview Rock (unofficial name I'm giving it) to the right (south). I say chimney-like because I'm not sure if it fits the definition of a full and proper chimney but it's certainly chimney-esque once you're in it so I'll just call it a chimney. 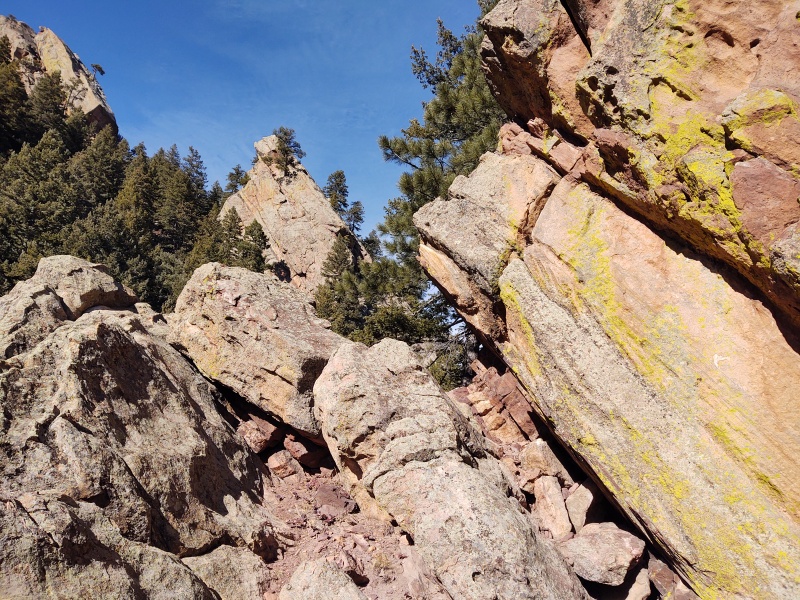
This clearing is the easiest place to switch to climbing shoes. The chimney can be done without climbing shoes but I strongly advise you to use climbing shoes for the ramp since a fall has the potential to be fatal! Might be ok with shoes that have decent traction but if you bust some bones or worse due to a fall, don't say I didn't warn you! Again this is fun with a little experience but dangerous for the inexperienced (ok, enough butt covering disclaimers...) 
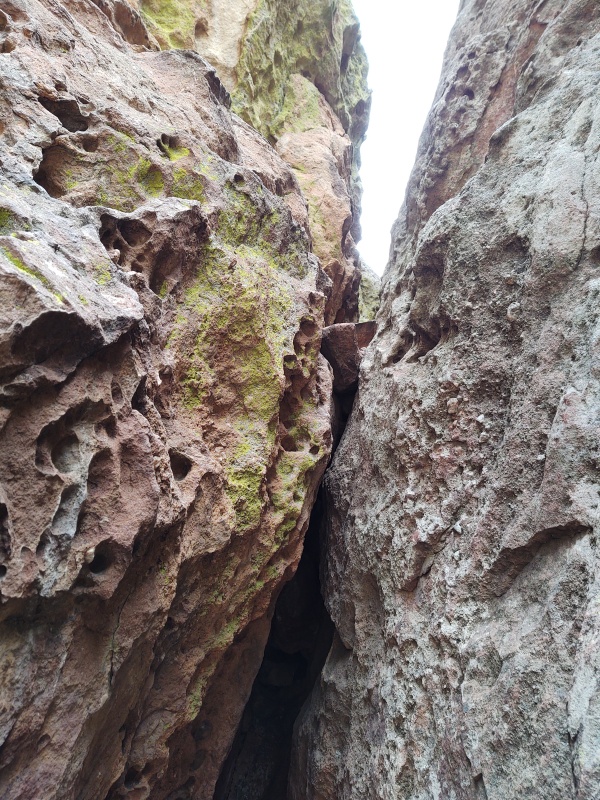
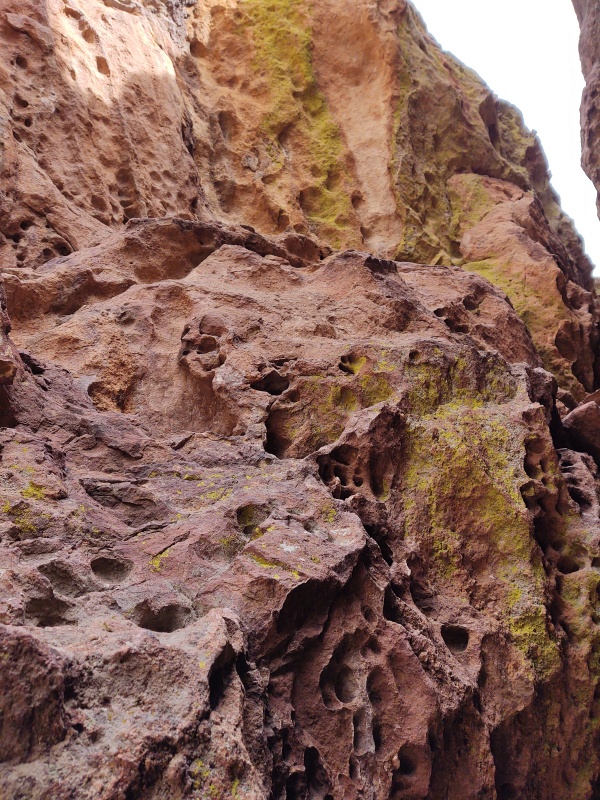
The Chimney I've updated this section with some better photos. The photos above and below makes it look very narrow but that's partly an illusion of the angle. I'm 6'2" and it felt like I was stretching my legs apart somewhat far to walk up the thankfully very large holds. Not like a huge stretch - maybe 2 or 3 feet apart - but enough to feel a bit awkward. Better climbers could probably find a more graceful way to do it but hey, whatever works... 


Overview Rock and the Step Around The chimney-esque feature becomes more of an open crack as you pop up a little ways and start to get a view out east. From here I recommend stepping around to the right to the adjacent Overview Rock, as I'm calling it, for the obvious reason that it gives you a place from which to get a very nice overview of your mission, should you choose to accept it... It does require a couple exposed steps to get over there but there are very large solid holds that make it easy (if you can't handle stepping over there then just enjoy the view where you're at and don't even think about trying the ramp). There is just enough of an indented lip along the front edge of Overview Rock to stop and switch over to climbing shoes if you don't already have them on (one last reminder - I really, really recommend them for the ramp). 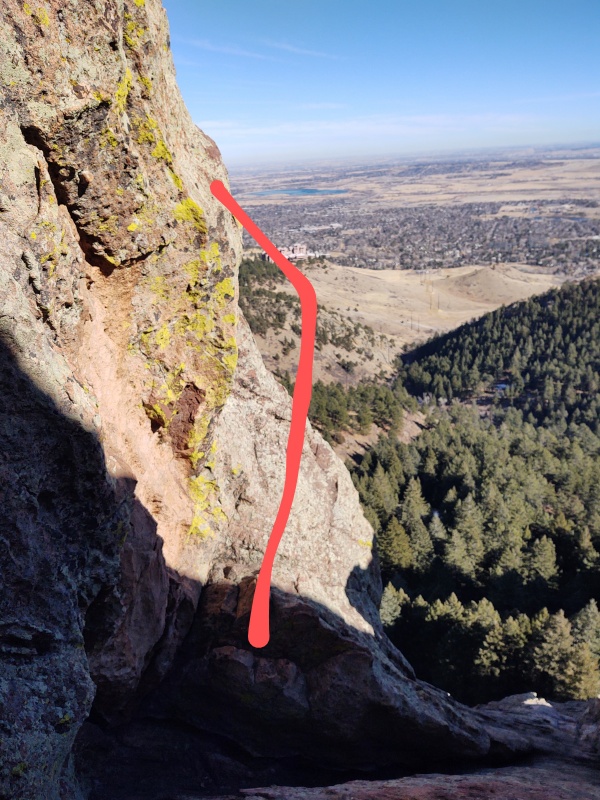
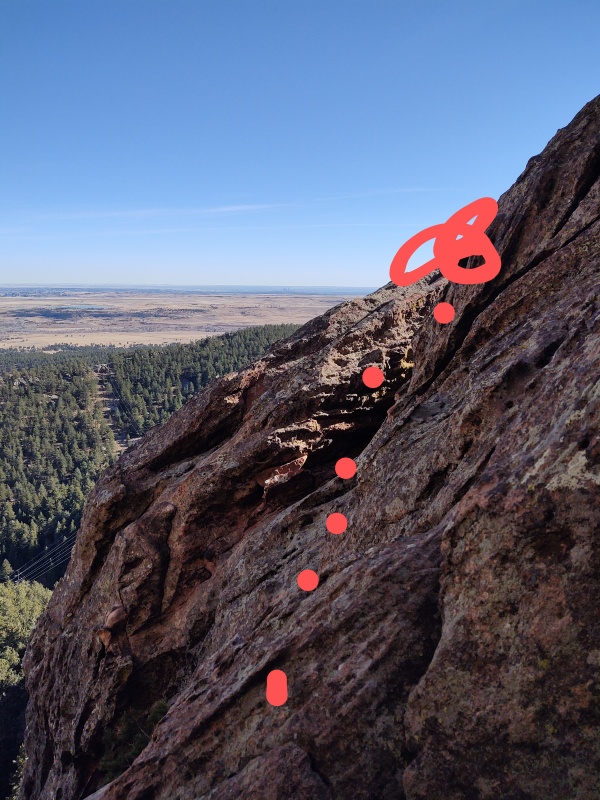
From Overview Rock take a quick peek over at Der Zerkle to see what you'll face. Note the large sheet of rock up against the sky on the right creating an overhang just in from the edge in the photo below. This is your security blanket of sorts for this route (a more experienced climber might not feel as much need for it but boy was I glad to have a huge solid hunk of rock that I could grip from underneath as well as on top so that I didn't feel that my life was fully in the hands of... well, my feet...). 
Scroll back up if needed for a look at the step around. It looks at first like you're going to step out into nothing but the ramp is just around the corner. 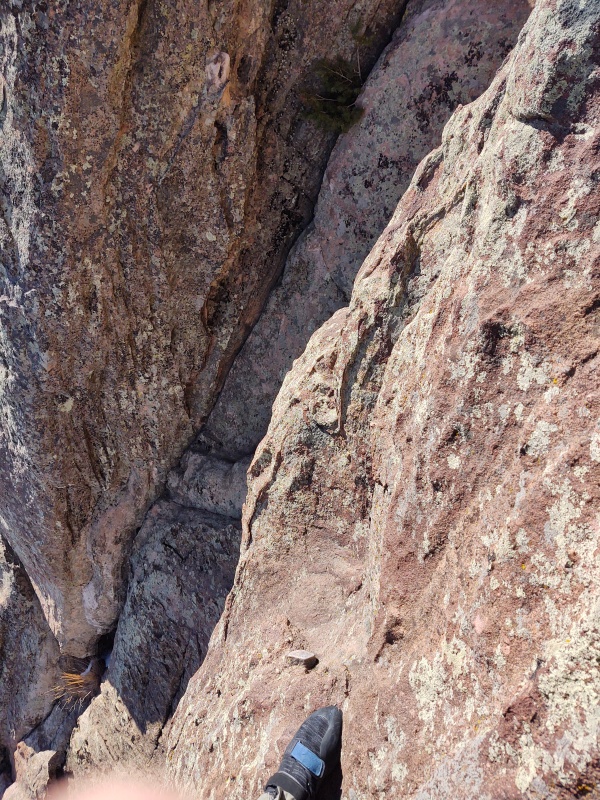
The next photos were taken coming down off the ramp but might help also in confirming you're coming up on the right spot. This step around was slightly uncomfortable since it's hard to see around until you step onto the exposed lip at the base of the ramp but the footing here is super solid. 

The Ramp This is your last chance for an easy bailout. If you're not feeling it, maybe go do Mallory Cave which has a fun little scramble at the very end. Being still pretty new to the climbing world this little ramp was enough to get my heart pumping pretty good, though part of that was from the unknown since I had no route guidance and had to question if this was really doable. Others who have done the harder routes in the Flatirons have mentioned hardly remembering this but if you've only been playing on the easy routes get ready for some fun... 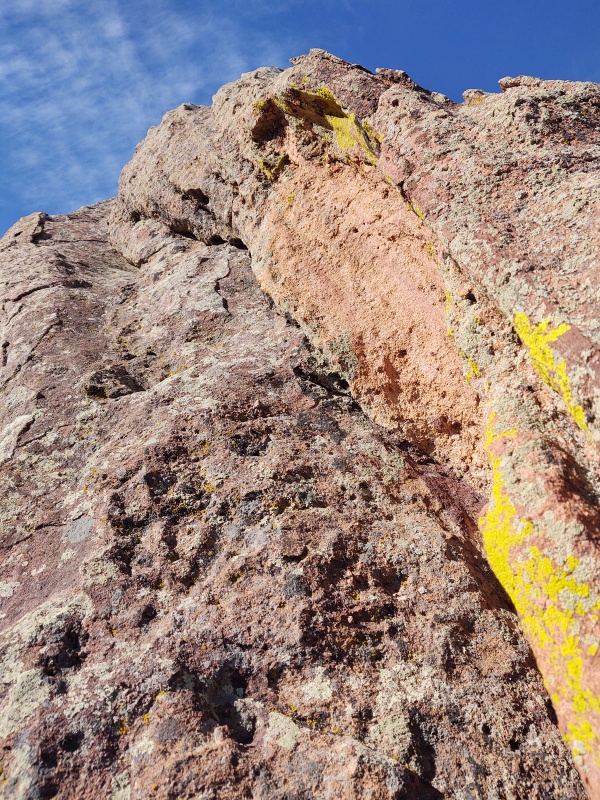
The ramp is steep, narrow and has so-so footholds - if that's all that was there I probably would have looked for a different route. The secret to this route is that awesome overhang. I was able to get a firm, strong grip under the overhang with my left hand the entire way up that portion while often finding at least some little nub on the top to grip with my right hand. Thus I relied heavily on my climbing shoes for traction but used my left hand under the overhang to kind of pull myself down onto the rock for stability while keeping some sort of grip with my right hand as an emergency backup. Probably sloppy looking form but it got the job done. Simply do in reverse for the descent (haha, the brain says "simply" the nerves say "you call that simple!?!") . The Summit and Descent Once the overhang runs out you reach a break in the rock with a flattish spot where you can pause and enjoy the view. From here it's maybe another 15 feet up slanted rock to the summit. The holds are neither great nor terrible - climbing shoes again provide a major confidence booster on this last little segment. You do have the indent at the top of the ramp as somewhat of a fall buffer here though the angle is less than (or certainly feels less than) the ramp. 
The summit has room for only perhaps a couple people (depending on how cozy you want to get near major exposure). Standing upright on the top edge is a good way to see how much of a fear of heights you actually have (do at your own risk...). 

Going back down the first time was even more intimidating than going up, as is usually the case. The angle of the photo below makes it look like the ramp is huge and trivial until you look closer at the shadows and realize the larger flat section to the right is actually the top of Overview Rock, which is on the opposite side of the chimney and much lower in elevation. So there's only maybe a couple feet to work with on the ramp before you'd fall down into the chimney (scroll back up to the first image in the report if you want an idea of why that would be bad - very bad!). 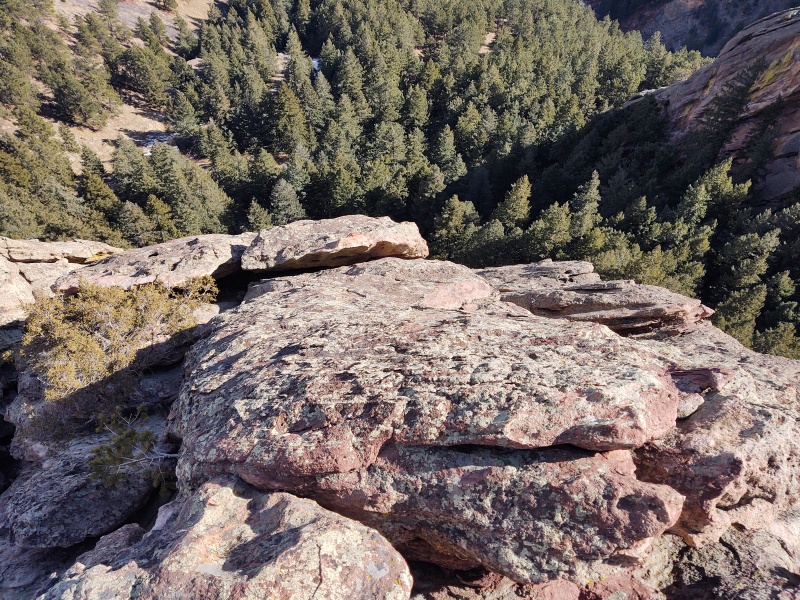

Below, for a better perspective is another shot from Overview Rock which shows the Der Zerkle summit at left and the overhang rock along the ramp against the sky at the right. This gives you some feel for the uncomfortably steep and exposed nature of the ramp - pretty typical for the Flatirons but pretty intimidating the first time you go up a feature like this. 
The Views There's a neat view of Mallory Cave from the summit of Der Zerkle - took me a moment of scanning to actually spot it. That's a fun hike too and it can be entertaining to watch/listen to the tourists trying to handle the last little scramble up towards the cave, lol. If you bring your climbing shoes you can also wow the tourists with some of the alternate paths up to the cave... (all of which are much easier than Der Zerkle but fun and easy). 

Sunnyside Two The first time I went over to Der Zerkle it was to find a class 4 route described in Simon Testa's guidebook (The Best Flatiron Scrambles). But I didn't read the directions close enough or misunderstood because I ended up trying to come up from the NE corner before getting stuck above what I learned today (just before adding this update) was the real Sunnyside Two route. Sunnyside Two is indeed a class 4 route and much easier than the Southern Squeeze route described above (that's my own made-up name). The real Sunnyside Two starts just along the Mallory Cave trail along the south side of Der Zerkle but it's easy to be mislead by the signs - you want the blank sign below the Mallory Cave sign - if you see the Der Zerkle Climbing Area sign you've gone too far - go back downhill to the other one (see photos below). 

If you have Simon Testa's guidebook you'll recognize the picture from his description once you step past the sign. 

This is a fun, easy route - still class 4 but the easiest route in Testa's book and about the easiest you'll tend to find described for the Flatirons. Also a great warm-up for anyone wanting to get to the Southern Squeeze route I made up as described in the first part of this report. 
Below are a couple more photos with cheesy phone annotation to make the route more obvious. 

There's a route from the NE corner of Der Zerkle that almost connects to Sunnyside Two but I couldn't handle the last 15ft or so needed to drop off an overhang above the route down to the little scrawny tree. I'm guessing at least some mid class 5 moves or higher would be needed to connect it. Until I can possibly prove that in later years I won't bother to describe that route as it has some dangerous ledges that I don't want to lure the inexperienced onto - but if you're a solid climber just follow the ridges and lips... 

I might do some more of these if I find other routes that strike my fancy. In the meantime, have fun and stay safe! Thumbnails for uploaded photos (click to open slideshow): ")
")
")
")
")
")
")
")
")
")
")
")
")
")
")
")
")
")
")
")
")
")
")
")
")
")
")
")
")
")
")
")
")
")
")
")
")
")
")
")
")
")
")
")
")
")
")
")
")
")
|
| Comments or Questions | ||||||
|---|---|---|---|---|---|---|
|
Caution: The information contained in this report may not be accurate and should not be the only resource used in preparation for your climb. Failure to have the necessary experience, physical conditioning, supplies or equipment can result in injury or death. 14ers.com and the author(s) of this report provide no warranties, either express or implied, that the information provided is accurate or reliable. By using the information provided, you agree to indemnify and hold harmless 14ers.com and the report author(s) with respect to any claims and demands against them, including any attorney fees and expenses. Please read the 14ers.com Safety and Disclaimer pages for more information.
Please respect private property: 14ers.com supports the rights of private landowners to determine how and by whom their land will be used. In Colorado, it is your responsibility to determine if land is private and to obtain the appropriate permission before entering the property.